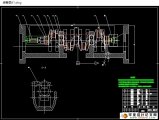
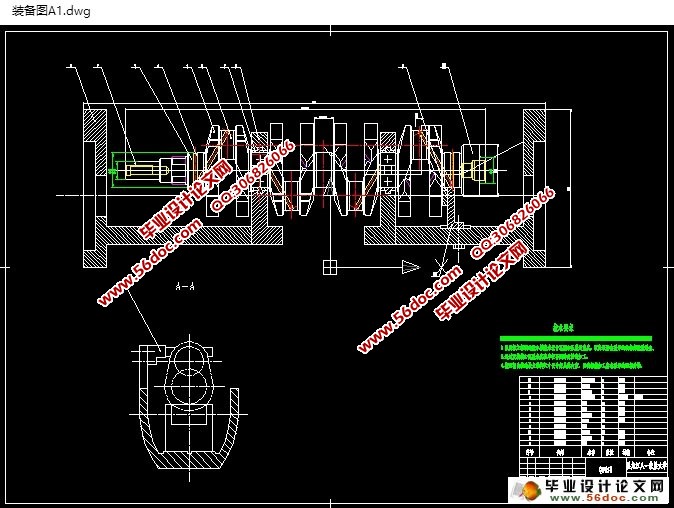
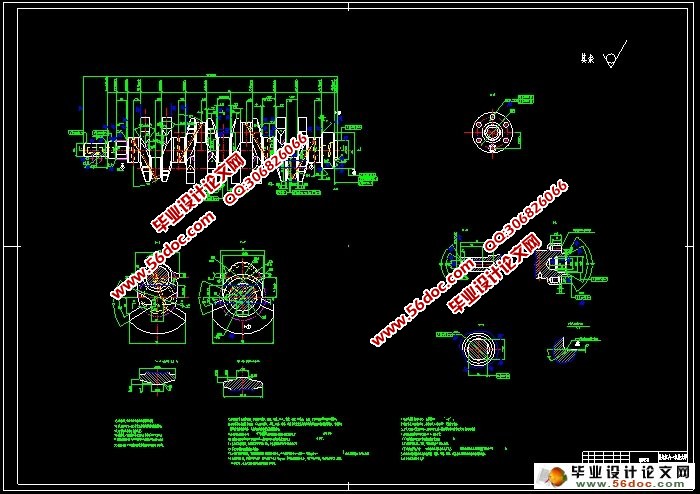
ЧњжсМгЙЄЙЄвеМАМаОпЩшМЦ(КЌCADЭМ,CAXAЭМ,МгЙЄЙЄађПЈ)(ШЮЮёЪщ,ПЊЬтБЈИц,жаЦкМьВщБэ,ТлЮФЫЕУїЪщ16000зж,CADЭМжН2еХ,CAXAЭМжН2еХ,МгЙЄЙЄађПЈ)
еЊ вЊ
БОЩшМЦжївЊЮЇШЦЗЂЖЏЛњЧњжсЕФЙЄвеЙцГЬКЭзЈгУМаОпЩшМЦНјаабаОПЃЌЦфФкШнАќРЈСЫНтЧњжсНсЙЙЃЌШЗЖЈЧњжсЕФЩњВњРраЭЃЌЯрЙиЕФММЪѕвЊЧѓЁЃдкДЫЛљДЁЩЯЃЌНјааЛљзМЕФбЁдёЃЌжЦЖЈСЫБэУцМгЙЄЗНЗЈЃЌЛЎЗжМгЙЄНзЖЮЃЌИљОнЩњВњРраЭШЗЖЈЙЄађЕФМЏжаКЭЗжЩЂЃЌКЯРэЕиАВХХЙЄађЃЌБрХХКЯЪЪЕФЙЄвеТЗЯпЃЛНјааЯъЯИЕФДѓСПМЦЫуЃЌАќРЈЃКМгЙЄгрСПЁЂЙЄађГпДчКЭЙЋВюЕФШЗЖЈЁЂЧаЯїгУСПЕФМЦЫуМАЪБМфЖЈЖюЕФМЦЫуЁЃДгЖјжЦЖЈГівЛЬзКЯРэЕФЛњаЕМгЙЄЙЄвеПЈЦЌКЭЛњаЕМгЙЄЙЄађПЈЦЌЁЃ
змжЎЃЌЧњжсМгЙЄЙЄвеЕФАВХХвдМАзЈгУМаОпЕФЩшМЦЪЧвЛЯюЗЧГЃИДдгЕФИпФбЖШЙЄзїЁЃЫќЪЧвЛжжашДѓХњСПЩњВњЕФСуМўЁЃЧвММЪѕвЊЧѓБШНЯИпЃЌЮЊСЫШЗБЃВњЦЗЕФжЪСПКЭЫЎЦНЃЌЩшМЦЙЄзїАДееПЦбЇЕФГЬађНјааЃЌЗжЧхжїДЮЃЌКЯРэШЁЩсЁЃ
ЙиМќДЪЃКМаОпЃЛЧњжсЃЛЙЄве
Abstract
The design was studied that was focused on transmission with the shift fork of the protocols and proprietary drilling fixture design, whose contents were included that the use of blades, the blades type of production and the relevant technical requirements. On this basis, the rough was chosen, and the size of the rough was determined, and the mechanical allowances were determined. A rough map was drawn. After carefully detailed analysis of the parts map, the benchmark was chosen, the development of surface processing methods was determined, and the demarcation of the processing stages was divided. According to the production process the type of centralization and decentralization was determined, the process was reasonably arranged, and the order and orchestrates a suitable process line were set up. Then some detail was calculated, such as allowance, processes size and the determination of tolerance. The amount of calculation and the calculation of the fixed time was cut. Thus a set of reasonable card processing machinery and mechanical processes cards were drawn up.
The second part of the design was the focus of this issue which was difficult, who was mainly centered on proprietary drilling fixture design, Z525-use vertical drilling, drilling screw hole design process by which a drilling fixture. Firstly fixture was designed to clear the major tasks identified by positioning components, guidance devices, clamping body fixture structure, access to the relevant national standards, painting fixture assembly.
The study of the subject transmission blades was used in the transmission gearbox shift agencies. Through the design of the transmission plectrum shift gearbox bodies changed stalls, thus it changed the speed of automobile.
This paper transmission plectrum design of technical rules, transmission truly achieved the change stalls and shift function, against drilling fixture design, realization of the drilling screw hole of this procedure.
In short, the design of transmission plectrum was a complex task. It was the typical products in mass production. To ensure the quality of products and the level of design the work must be produced in accordance with the scientific procedure, prioritize, reasonable choice
Keywords: Plectrum;machining; technical rules;manufacturing technology;fixture
СуМўЕФЙЄвеЗжЮі
ЇЖ25mmЕФдВжљФкБэУцЃЌМгЙЄЪБвЊБЃжЄЇЖ25 + 00.023ЕФ0.023ЙЋВювЊЧѓЃЌвдМАБэУцДжВкЖШRa1.6ЃЌБэУцвЊЧѓНЯИпЁЃ1.2.СуМўЕФЙЄвевЊЧѓ
СЌИЫЕФжЇГХЕзАхЕзУцЃЌДжВкЖШвЊЧѓRa3.2,ЭЌЪББЃжЄСЌИЫЕФИпЖШ30mmЁЃ
ЩЯЖЫУц40×30mm,ДжВкЖШвЊЧѓRa3.2,ЭЌЪББЃжЄгыЇЖ25mmЕФдВжљжсЯпЕФОрРы90mmЃЛЯТЖЫВрУцБЃжЄГпДч17mmЃЌДжВкЖШвЊЧѓRa6.3ЃЛРыЇЖ25mmЕФдВжљжсЯп45mmЕФВрУцДжВкЖШвЊЧѓRa12.5ЁЃ
ЩЯЖЫУц2×M6ЃЌБЃжЄГпДч10mmЁЂ20mm,ГСЭЗзЖНЧ120°ЃЌДжВкЖШвЊЧѓRa6.3ЃЛM8ЕФТнЮЦПзЃЌяСЇЖ14×3mmЕФдВжљПзЃЌДжВкЖШRa3.2ЃЛзъЯТЖЫЇЖ12.7 + 00.1ЕФзЖПзЃЌБЃжЄЙЋВювЊЧѓЃЌвдМАжааФЯпгыЇЖ25mmЕФдВжљжсЯпЕФОрРы60 mmДжВкЖШвЊЧѓRa6.3ЁЃ ИљОнИїМгЙЄЗНЗЈЕФОМУОЋЖШМАвЛАуЛњДВЫљФмДяЕНЕФЮЛжУОЋЖШЃЌИУСуМўУЛгаКмФбМгЙЄЕФБэУцЃЌЩЯЪіИїБэУцЕФММЪѕвЊЧѓВЩгУГЃЙцМгЙЄЙЄвеОљПЩвдБЃжЄЁЃ
вРЩшМЦЬтФПжЊЃКЃбЃН5ЃАЃАЃАЬЈЃЏФъЃЌn=1МўЃЏЬЈЃЌНсКЯЩњВњЪЕМЪЃЌБИВњТЪαКЭЗЯЦЗТЪβЗжБ№ШЁЮЊЃБЃАЃЅКЭЃБЃЅЁЃДјШыЙЋЪНЕУИУСуМўЕФЩњВњИйСьNЃН ЃН5555МўЃЏФъСуМўЪЧЛњДВЕФИмИЫЃЌжЪСПЮЊЃА.ЃИЃЕkg,ВщБэЃВ-ЃБПЩжЊЦфЪєЧсаЭСуМўЃЌЩњВњРраЭЮЊДѓХњЩњВњЁЃ
ФПТМ
еЊ вЊ II
ABSTRACT III
ФПТМ IV
ЧАбд - 1 -
1.СуМўЕФЙЄвеЗжЮі - 2 -
2ЃЎбЁдёУЋХїЃЌШЗЖЈУЋХїГпДчЃЌЩшМЦУЋХїЭМ - 3 -
3ЃЎбЁдёМгЙЄЗНЗЈЃЌжЦЖЈЙЄвеТЗЯп - 4 -
3.1жЦЖЈЙЄвеТЗЯп - 4 -
4. жсМгЙЄЙЄађЩшМЦ - 8 -
4.1.ЯДСНЖЫУц - 8 -
4.2. зъжЪСПжааФПз - 9 -
4.3.ГЕЯїгыжїжсОБЭЌжсЕФЫљгажсОБ - 10 -
4.3.1.ЧаЯїгУСП - 10 -
4.4. ГЕЯїШЋВПСЌИЫжсОБ - 11 -
4.4.1.ЧаЯїгУСП - 11 -
4.5.ДжФЅЫљгажїжсОБЁЂСЌИЫОБЁЂЗЈРМгыЧњжсжсЭЗ - 12 -
4ЃЎ6.ОЋФЅЫљгажїжсОБЁЂСЌИЫОБЁЂЗЈРМгыЧњжсжсЭЗ - 14 -
5.ПзМгЙЄЙЄађЩшМЦ - 16 -
5.1ДжЯГM6ПзЖЫУц - 16 -
5.1.1ЧаЯїгУСП - 16 -
5.1.2.ЛљБОЪБМф - 17 -
5.2.ОЋЯГM6ПзЖЫУц - 17 -
5.2.1ЧаЯїгУСП - 17 -
5.2.2.ЛљБОЪБМф - 18 -
5.3.зъ2-M6ЕзПз - 18 -
5.3.1.ЧаЯїгУСП - 18 -
5.4ШЗЖЈЙЅ2-M6ТнЮЦЕФЧаЯїгУСП - 19 -
5.4.1.ЧаЯїгУСП - 19 -
5.4ЃЎ2.ЛљБОЪБМф - 19 -
5.5МгЙЄΦ12.7×4.4ЕзПз - 20 -
5.5.1ЃЎзъПз - 20 -
5.6РЉΦ12.7MMУЄПз - 21 -
5.6.1ЃЎУЄПз - 21 -
5.6.2.ЛљБОЪБМф - 21 -
6.МаОпЩшМЦ - 23 -
змНс - 24 -
ВЮПМЮФЯз - 26 -
жТаЛ - 27 -
|
